Belden 83754 Star-Quad Powercord
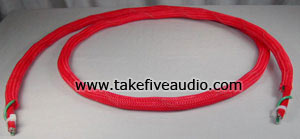
The first step is to install the ground wire. The 12 AWG Mil Spec ground wire is cut to a length of 6 feet and fastened to the 5 foot length of Belden 83754 with a Ty-wrap placed about 1/2" from the end. Make sure you pull it tight, the Teflon jackets are quite slippery. Next look at the 83754 and determine the direction in which the cable has been twisted and begin winding on the ground wire in the opposite direction making sure that your winding is evenly spaced along the length of the cable. Our cable in the photo has the ground making one complete revolution every 2 1/2 inches. When you get to the end fasten the ground to the 83754 with another Ty-wrap placed 1/2" from the end of the cable as you did on the other end.

Next cut off the ground wire flush with the ends of the 83754 on both ends and then cut off the excess Ty-wrap. Fuse the ends of a 6 foot length of 3/8" Poly sleeve and install it over the cord assembly. We went for a loose fit on this cord but you can pull it down tight if you wish. This will change the length requirements slightly.

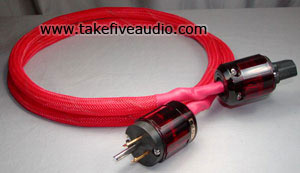
Now it's time to secure the Poly sleeve and ground wire to the cable using the 2 3/4" long pieces of 3/4" CPA 100 shrinktube. Do not remove the Ty-wraps yet, these will be removed after the shrinktube has been applied and cooled. Adjust the Poly sleeve so that it is about 80 mm from the end of the cable on both ends, then slide the shrinktube over the end of the cable leaving about 45 mm of cable showing. Use a heatgun to shrink the tubing. It is a good idea to make a heatshield for the Poly sleeve from some folded tinfoil. This will help to avoid melting the Poly sleeve with the heat as you shrink it down where it meets the sleeve. Repeat at other end, after it has cooled cut off the Ty-wraps and you should have something that looks like the picture.

Now we prepare your cable for termination. Strip back the outer jacket to within 10 mm or so of the shrinktube. On the IEC end you will remove both the foil and braided Copper shield. At the wall plug end you will use a pointy object (I used a dental pick) to unravel the braided shield on the opposite side of the ground wire, so that when you bring it to the other side and twist it together the braided shield and ground wire are in close proximity as in the photo. This is important since the twisted braid shield will be terminated with the ground wire on the wall plug end. I used a small piece of shrinktube to cover the bare ends of the cut braided shield on the IEC end.

Next slide on the connector housings. These particular connectors fit this recipe perfectly without the removal of the cord clamp insert. When the housings are on snip all the wires off to 26 mm in length from the edge of the cable jacket and strip 12 mm of insulation from the end. Next sort out the wires to get our Star-Quad geometry. If you look at a cross section of the wire you will have a conductor at 12:00, 3:00, 6:00 and 9:00, 12:00 and 6:00 will be combined for positive and 3:00 and 9:00 will be combined for Neutral (or vise versa the important thing is that you use the same scheme at both ends) with the 83754 the Black and Red will make up the "Hot" and Green and White will make the "Neutral". I like the Oyaide connectors for Star-Quad cables because the terminal pockets have the fastening screw in the middle. This allows you to terminate the two wires with one on either side of the screw instead of having to twist them together and put them in the same hole as with the Marinco and Wattgate connectors.

Carefully check your connectors for the markings which indicate polarity, make sure you are putting the right wires in the right terminals. Installing the connector is made easier if you take the time to form the wire in such a way that the stripped ends are lined up with the terminal pockets. This way you can just push the connector on and have all the conductors engage the terminal pockets at once. Tighten the terminals to the recomended torque. I put a drop of Stabilant 22A on the wire strands before I install the plugs to ensure the best contact. At this point check for shorts with a multimeter and carefully visually inspect the braided shield where it is combined with the ground wire at the wall plug. The small stray strands of wire can be hard to see and have the potential to get where they don't belong and cause a short!

Now slide the housings forward onto the connectors being carefull to line up the keyways in the body and tighten the screws. Next tighten down the cord clamp screws. That's it, your done. Plug that cable into your amp and enjoy!


